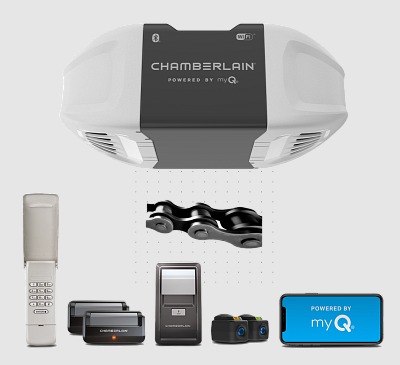
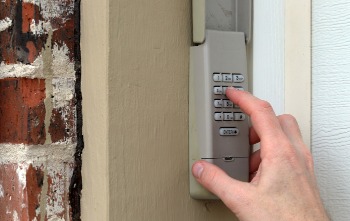
The Chamberlain garage door keypad is a convenient way to access your garage without a remote or keys. However, resetting the Chamberlain garage door keypad without an enter button can be challenging. Resetting the keypad is essential in various scenarios, such as changing the entry code or correcting connectivity issues and fortunately, there are many easy ways in which you can reset the Chamberlain Garage Door Keypad.
So, are you wondering How To Reset the Chamberlain Garage Door Keypad Without an Enter Button? Well then, you have arrived at the right place because, in this blog, we’ll provide you with some quick and easy steps that will fix your issue conveniently.
So, just have a quick look at this guide which will come in handy for you as well always.
Step 1 - Just begin by uncovering the Garage Door Opener remote control to show the switches internally embedded.
Step 2 - Now continue pressing the * and # pound button simultaneously which will be followed by the blinking of the red light after which the password will stand reset.
Step 3 - In this ensuing step you have to enter the new password well succeeded by pressing the # pound button after which you will have to punch in the type of your Garage Door Opener pertaining to which the location of your Garage Opener is displayed on the back of the same and it comes in the range from 1 to 9.
Step 4 - Here you just have to press the pound button.
Step 5 - This step gets you the ladder in which you have to step into followed by pressing the Learn Button on the Garage Door Opener.
Step 6 - Now approach the keypad bolted outside the Garage Door sufficiently before the blinking light stops and press the New Password key followed by pressing 0 three times.
Step 7 - Please note that after you have successfully carried through the above-preceding steps your Garage Door opener will start functioning seamlessly and this way you will be able to reset Chamberlain Garage Door keypad without Enter button.
Method 1 - You can Use the Garage Door Opener Learn Button to Program your Chamberlain Remote.
Step 1 - Just find the Learn button on the Garage Door opener.
Step 2 - Now you have to press and promptly release the Learn button as a consequence of which the LED will start glowing consistently.
Step 3 - Within a time span of 30 seconds just press the button on the Remote Control that you are willing to operate your Garage Door.
Step 4 - Either the Garage Door opener will flash the lights or two clicks are going to be heard which will be an indication that the Remote Control is programmed.
Method 2 - Programming the Chamberlain Remote Using the Door Control Learn Button
Step 1 - When you are navigating the Door Control just find the Learn button.
Step 2 - Now press the Learn button two times which will cause the LED to blink.
Step 3 - Just hold, press, and release the button on the remote control linked to the Garage Door.
Step 4 - Consequently, the Garage Door opener lights will continue to flash two lights or will give rise to the sound of two clicks subsequent to which the Garage Door remote control will be programmed.
Method 3 - Programming the Remote Using the Smart Control Panel
Step 1 - In a bid to view the Features Menu just find and locate the Navigation button.
Step 2 - By utilizing the Navigation button just scroll to Program.
Step 3 - Now choose and select the REMOTE to program using the Program Menu.
Step 4 - Just continue pressing the button on the Remote control that you use to operate the Garage Door.
Step 5 - Here again the flashlights will become visible or you are bound to hear two clicks.
 Related Blogs
Top 11 Best Smart Home Devices & Systems of 2026
How to Use Google Lens on iPhone?
Top 7 Best Smart Home Security Systems of 2026
How to Connect Philips Hue Devices?
© 2026 SmartDevicesHelp.com. All Rights Reserved.

Top Searches in smart devices