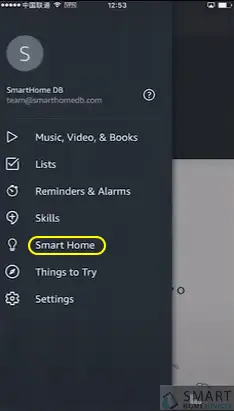
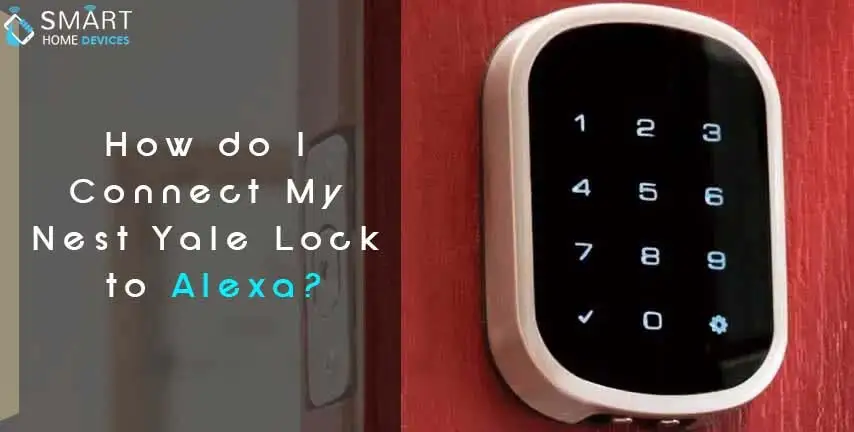
Your Digital Yale Lock can be controlled using the Alexa personal assistant in a simple way forming part of this brief walkthrough. So, connect your Nest Yale Lock to Alexa by adhering to every sequential step discussed here. Simply begin by tapping the “Menu” option followed by opening the Smart Home Skills option under the “Smart Home” feature.
Now get “More Smart Home Skills” page opened, enter the Smart Things in the search box, and tap the “Enable Skills” option going forward. Continuing with the process, just add the username and password followed by choosing the “Smart Thing” location and authorising the procedure subsequently to finally connect Nest Yale Lock to Alexa.
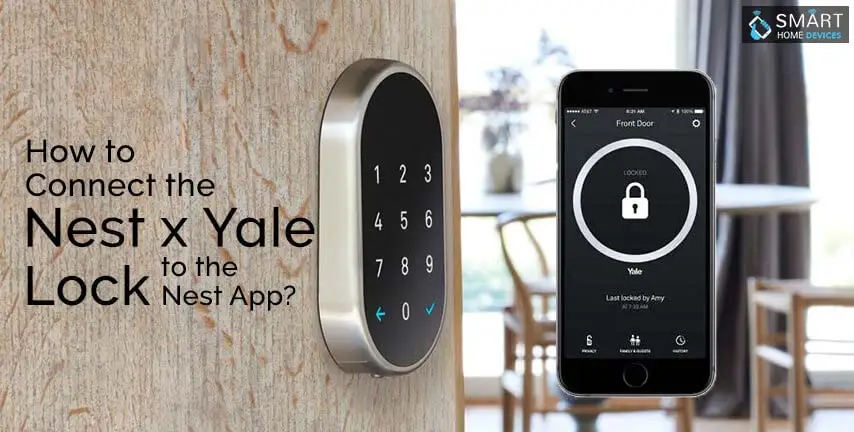
Alexa is a virtual personal assistant that is designed to compete with apple’s Siri, Google Now, and others. Whereas Yale lock is a digital door lock. It offers a convenient and smart digital lock solution for your home and office.
In this Article, We are Going to Explain How do I Connect My Nest Yale Lock to Alexa in Step by Step Manner.
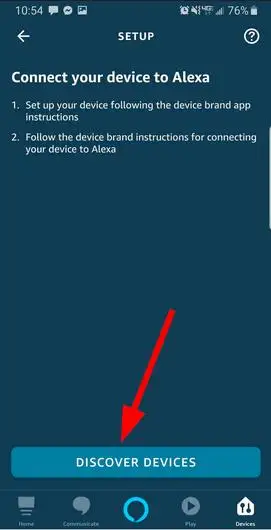
In the previous section, you have given permission to Alexa to access the smart thing device and routine. Now your Alexa device needs to find the lock.
Note: device discovery will discover your routine also.
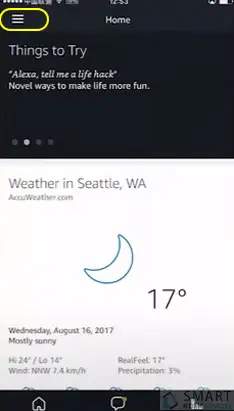
At the Amazon Alexa application.
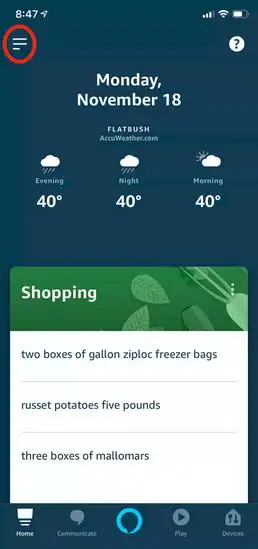
Step 1: First you need to tap on the menu (Menu is showing in three horizontal lines).
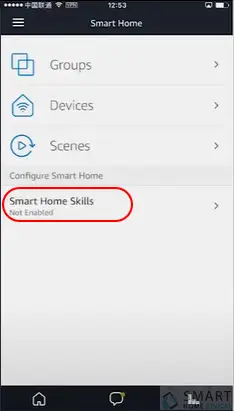
Step 2: Now you need to tap on the smart home option.
Step 3: Thereafter you need to scroll your smart home skill.
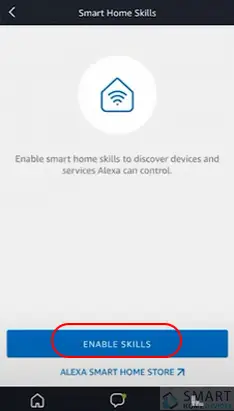
Step 4: Then tap on get the more smart home skills.
Step 5: Now you need to enter smart things in the search box.
Step 6: Thereafter tap on enable to enable smart thing.
Step 7: Now you need to enter your smart thing username and password to connect with Alexa.
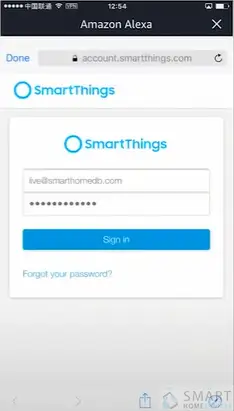
Step 8: Then tap on the login option.
Step 9: Now choose your smart thing location from the menu.
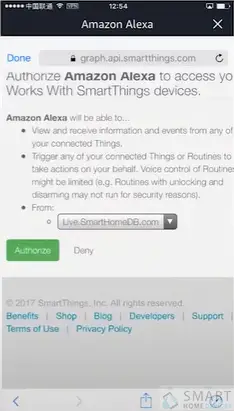
Step 10: Thereafter tap on authorize (Note: You can set a limit for Alexa to access later in your smart thing application).
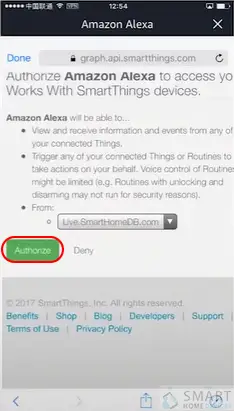
Step 11: Once all the things become authorized, you will get the following message which is Alexa has been linking successfully with smart things.
Step 12: Tap on X to close the window and start device locating.

At the smart thing application-
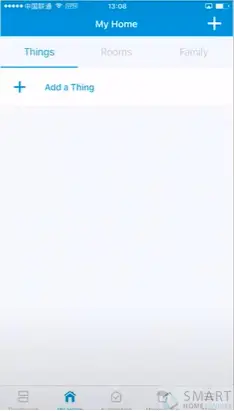
Step 1: First you need to tap on the MyHome tab.
Step 2: Tap add a thing at the bottom of the thing list which is under the things tab.
Step 3: Now the application will display looking for the device.
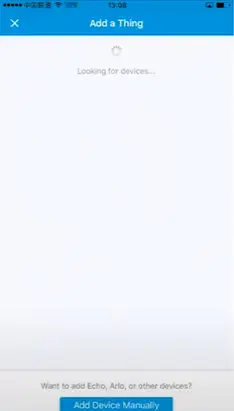
Step 4: During the hub search, you need to bring a lock within 10 feet range of the hub then.
Step 5: You need to press any key to wake it if it is required.
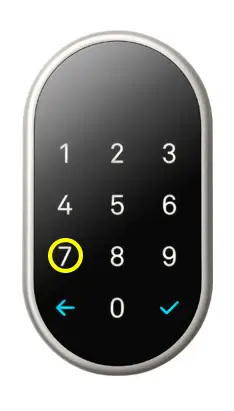
Step 6: Enter 4-8 digit master PIN code followed by # or gear key.
Step 7: Thereafter press 7 followed by gear or # key.
Step 8: Tap 1 followed by gear or # key.
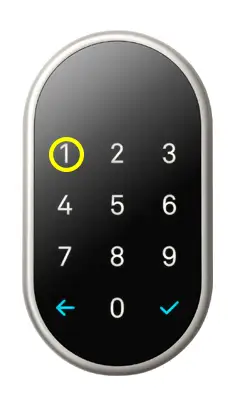
Step 9: Now you need to wait for 60 seconds.
Step 10: When the device is located, it will be listed at the top of the screen.
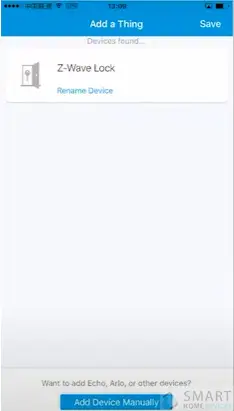
Step 11: Now you need to tap the device to rename it and then press the done.
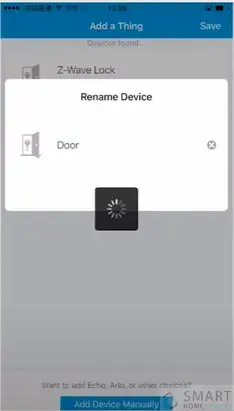
Step 12: We advised you to rename your door like the front door, back door, etc.

Step 13: This is the name that you will use to speak to Alexa.
Step 14: Tap on Save when it is finished.
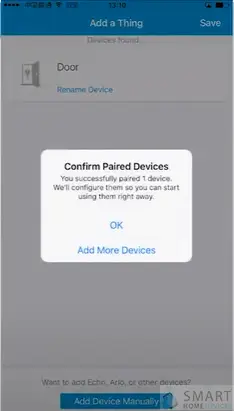
Step 15: You need to tap on OK to confirm.
Now all the setup is complete to connect my nest Yale lock to Alexa.
 Related Blogs
How to Update WiFi Settings on Nest Camera?
How Do I Get My Nest Camera Back Online?
How to Set up Nest X Yale Lock?
How do I Connect My Nest Yale Lock to Alexa?
© 2026 SmartDevicesHelp.com. All Rights Reserved.
Top Searches in nest camera