

Shark robot vacuums are designed to automatically clean your floors without direct human intervention. They basically come equipped with sensors to navigate around obstacles, avoid falls, and optimize cleaning paths.
Every robot vacuum owner faces problems now and then, and it's totally normal that machines catch an issue. So, are you having trouble fixing Shark Vacuum Error 9? Well, in this blog, we have given you some simple ways in which you can fix the Shark Robot Vacuum Error 9 issue.
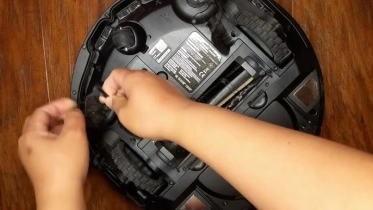
The Shark Robot Vacuum Error 9 altogether implies that the bumper of Shark Robot Vacuum Error 9 is not able to move freely which thereby creates a sort of constrain in facilitating the movement of its cleaning parts. This Shark matrix plus error 9 thus results in collecting dust and dirt from surrounding areas.
The Shark Robot Vacuum Error 9 is apparently a mechanical problem and thus the simplest way of fixing the Shark Error 9 is perhaps tapping out the bumper several times which will allow your Shark Robot Vacuum Cleaner to shed all debris and remove the unwanted blockages of the mechanism.
Another easy way to fix the Shark Robot Vacuum Error 9 is basically about implementing the concept of power cycling the Shark Robot Vacuum Cleaner. This can be done in the following way.
Step 1 - Simply begin by turning your Shark Robot Vacuum Cleaner upside down.
Step 2 - Then locate the Power switch on the electric plug panel or socket.
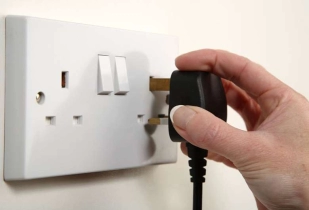
Step 3 - Continue by pressing the Power switch for at least 3-4 seconds.
Step 4 - Now patiently wait for the Robot Vacuum to shut down.
Step 5 - You now will have to wait for 1 minute followed by connecting the Robot to a charging base or the charging equipment ultimately.
Step 6 - Allow your Robot Vacuum Machine to stay on the charger for a time span of 5 minutes.
Step 7 - Finally, after it gets charged just unplug it and start using it to check whether the Shark Robot Vacuum Error 9 is resolved.
The Shark Robot Vacuum Error 9 might also be because of the dust that accumulated in the dust bin of the Shark Robot Vacuum. In this situation the process of clearing the dustbin can be executed in the way enunciated hereunder.
Step 1 - First, let the Shark Robot Vacuum Cleaner take itself to the charging point.
Step 2 - Now press the “Clean” button to allow the Shark Robot Vacuum Cleaner to discharge all the dust.
Step 3 - At this stage, you should empty out the Removable Dust Bin from the charging point.
Step 4 - Here you can take the Shark Robot Vacuum Cleaner from the Charging Station.
Step 5 - Now, finally try to use the device to figure out whether the issue of Shark Robot Vacuum Error 9 stands resolved or not.
 Related Blogs

Top 11 Best Smart Home Devices & Systems of 2026

How to Use Google Lens on iPhone?

Top 7 Best Smart Home Security Systems of 2026
How to Connect Philips Hue Devices?

Copyright © 2026 smartdeviceshelp | All Right Reserved.


Top Searches in smart devices