Want to install Nest cam iq outdoor security camera, there are many various choices for mounting and installing your Google Nest cam iq outdoor security camera. You can operate the power cable to an outdoor way out or to way out inside your home.
Getting Started: Start your Nest camera with an app.
Note: Be sure that you follow all rules and regulations, and you know where all in-wall pipes and electrical wires are before drilling. But, if you are not comfortable to drill over an exterior wall then you can contact any local Nest pro to install your camera.
Important Tools:
Phillips head screwdriver or drill with Phillips bit
Search a Good Location: Install Nest Cam iq outdoor camera where you want to is a good idea for you. Here are some ideas about things to think about.
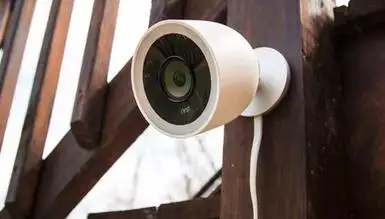
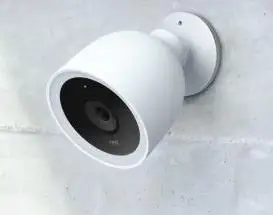
Examine the view: The Nest cam iq outdoor has a supersight close up tracking view; it has an automatic view option so it notices a person. You can install it near your front and backside door. It is no for a limited area. You can cover the large property of your area.
Fix it over your head: You can install Nest cam iq outdoor camera over your head height at the chosen location. 7 to 10 fit above from the ground but close enough to see people’s faces. And close to camera speaker and microphone so you can hear it.
Shelter must be good: The Nest cam iq outdoor is waterproof but sometimes raindrops and snowflakes stick with the lenses. Direct Sunshine on the camera can also affect on the video.
Video Streaming Test : Solid and isolated can decrease the Wi-Fi signal strength. Be sure your camera can stream video from the selected location.
Outline the Cable Path: Nest cam iq outdoor is developed to be plugged in to an indoor power outlet, then you have to plan how you can operate the cable through the wall.
Evaluate the Cable: Previously, you want to mount your camera evaluates the camera route where you want to install.
Set up the wall plate: Before you want to verify your installation plan is good, you can set up a wall plate.
Set up your camera: Plug it to the end of the power cable into the base of your camera. Press the camera base into the wall plate until it clicks into place.
Modify the view: Be sure your camera is plugged in and connected to the Wi-Fi. With the help of the Nest app, you can check the view when you adjust the camera angle.
Mount the cable: Protect the cable using the cable clips. You can install so many clips as you’re required.
Finished up here: Take off the sticker on the lens if you are done yet. And clean the dust or dirt.
Now, you can install Nest cam iq outdoor camera very easily through this article and I hope you find this article helpful for you.
 Related Blogs
How to Update WiFi Settings on Nest Camera?
How Do I Get My Nest Camera Back Online?
How to Set up Nest X Yale Lock?
How do I Connect My Nest Yale Lock to Alexa?
© 2026 SmartDevicesHelp.com. All Rights Reserved.
Top Searches in nest camera