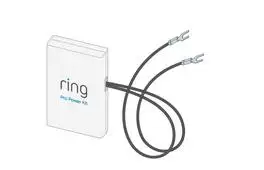
The Pro Power Kit ensures that enough power is sent to your Ring Doorbell, and IS REQUIRED for your Ring Doorbell to function. Before you install Ring Pro Power Kit with existing Ring Doorbell better to install Ring Pro outside.
Important Note: There can only be one Ring Pro per transformer. In case you have more than one Ring Pro it should be installed on a various transformer/power circuit.
We know that the Pro Power kit might look intimidating. Open up your doorbell and check if it's working with internal wires that is something few of us have ever done. But even if you've never wired anything in your life, we're confident that you can install the Pro Power Kit.
Step 1 : Be sure the switch is off at the breaker when installing your Pro Power Kit. You will have to look which breaker controls the location your doorbell's transformer is located and shut that one-off.
Step 2 : You will have to see your internal doorbell, and this may be the hardest part because many people have no idea where it is. It’s internal doorbell is the box that the sound comes from when people immediately push the button which is your Ring Doorbell now making it outdated-it usually high up on a wall around close to your front door or in a hallway.
Step 3 : The doorbell in the video below is a very common type of doorbell, but there are all sorts so there's no guarantee what it will look like. If you haven't removed your old doorbell yet, have someone push it a few times and try to figure out where the sound is coming from.
Step 4 : When installing the Pro Power Kit, remove one wire from your doorbell at a time-this way you won't get confused about which wire goes where.
Step 5 : Take the gray and orange wire clips (the yellow wire connectors are for connecting your Ring Doorbell Pro in the front of your home)
Step 6 : The orange levers on the wire clips are very hard. You really will feel like you're going to break them, but we haven't managed to break one yet so you should be alright.
Step 7 : When you are done wiring your Pro Power Kit, take a look in the house for it where it will be suitable. In case it's inside your doorbell and your doorbell is mechanical simply confirm that it's not in the way of any moving parts. We happen to think the plastic enclosure looks pretty cool, so recommend attaching it to the wall next to your doorbell if it doesn't fit inside.

Find below the steps to follow Install Ring Pro Power Kit with Existing Ring Doorbell.
Step 1 : Remove the cover on your internal bell.
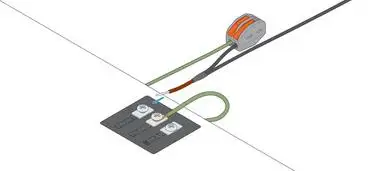
Step 2 : Attach the wire harness to the Kit. Disconnect your bell's ‘Front’ wire.
Step 3 : Look for Wires labeled ‘Front’ and ‘Transformer.’ Take the help of wire clips to connect the ‘Front’ Wire to the black wire on the Wire Harness.
Step 4 : Note that the orange levers are very sturdy and will not break.
Step 5 : Plug in the brown end of the black wire to the ‘Front’ terminal on your bell.
Step 6 : Disconnect your doorbell's ‘Transformer’ wire.
Step 7 : Take the wire clips to connect the ‘Transformer’ wire to the white wire on the Wire Harness.
Step 8 : Attach the blue end of the white wire to the ‘Transformer’ terminal on your bell.
Step 9 : Protect the Pro Power Kit inside of your bell, but don't let it get in the way of the moving parts.
Step 10 : Ensure the cover on your bell, turn the power back on at the breaker, and return to the front of your home to perform the in-app setup.
As I mentioned above all the information on how to install Ring Pro Power Kit with existing Ring Doorbell. Now, I hope you will be able to do it.
2nd Method:
In the post below we cover how to install Ring Pro Power Kit with your existing doorbell in step by step instructions below but we also provide you with some steps to usual troubleshooting problems with the Ring Doorbell Pro. If you’ve already gotten started with installing your Ring Doorbell Pro and gotten stuck you can click the links to our resources below.
The Ring Pro Power Kit covered with your Video Doorbell Pro is a small device so, confirm that enough power is delivered to your Ring Doorbell to function. It's essential so that for your Ring Doorbell to function correctly.
Now download a PDF of the instruction manual for the Pro Power Kit installation.
Symptoms:
Symptoms:
Symptoms:
Your Ring Pro needs a power root that supplies a minimum of 16 volts AC. To examine the voltage of your Ring Pro, go to the Ring app, choose your Ring Pro, and click on the Device Health. For Ring Pro to function properly, the voltage required to be listed as "Good" or at least 3,900mV.
These are all possible ways to connect your Ring Doorbell.And l hope now you will be able to install Ring Pro Power Kit with your Existing Doorbell. I also mentioned about the reasons behind these issues.
 Related Blogs
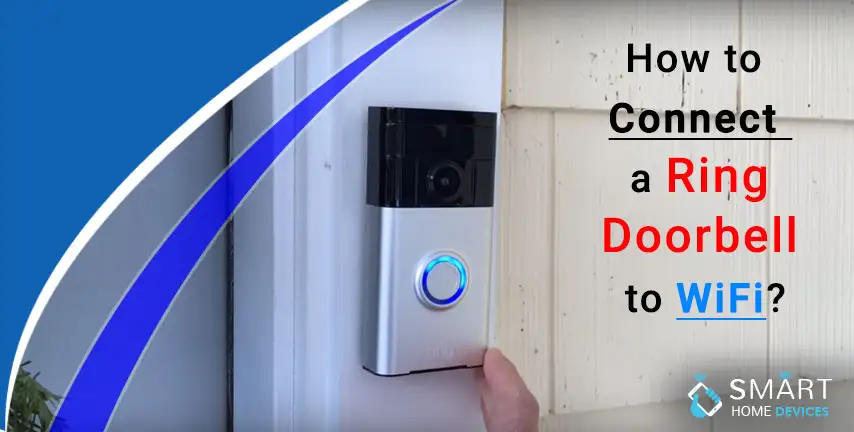
How to Connect a Ring Doorbell to WiFi?

How does Ring Doorbell Work with Alexa?

How to Change Wifi on Ring Video Doorbell 2?
© 2026 SmartDevicesHelp.com. All Rights Reserved.


Top Searches in ring doorbell