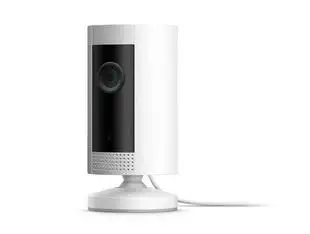
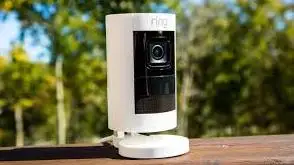
If you wish to learn how to setup Ring Stick Up camera in the Ring application, then you have come to the right place. Go down to follow step by step procedure in order to learn the setup process.
For downloading the Ring application, these are the steps that you need to follow.

In case you are using a Ring product for the first time, then you will be asked to create a new account. For setting up an account carry out the steps given below.
In case you have some other Ring device installed, then launch the Ring application.
In the next step, you need to select set up a device and then select Security cameras.

The QR code is placed at the back of your Ring Stick Up Cam.
In case you are setting up your Ring Stick Up camera device for the first time in your life, then you will get a request from your mobile device, which will ask for your permission to use the location services of your phone to find your location.
If you will enable your app to do so, then it will help you out in putting in your address. Enter the address details in your app and then confirm the details so entered. In case you entered the location earlier as well, then you can choose it from the locations appearing before it.
Pick a name for your device and then give it to your Ring Stick Up Cam to differentiate it from other devices on your account. Choose the default names which are recommended. Moreover, you can customize according to your wish by selecting the option of Custom at the end of the list.
At the back of your camera, you will see a button, which is orange in color. Press that button and then release it. When a white light starts blinking at the back of your camera, then select the option of Continue on your Ring app.
Select the option of Join on your iOS smartphone when the Ring app asks you to join the wireless network. In case you are using an Android phone, then your device will automatically get connected to the wireless network.
In case you wish to go ahead without scanning, then these are the steps that you need to carry out.
Please ensure that you are close to your access point and you know the password of your wireless network.
Once you are done connecting to the wireless network, your camera will update its internal software. At the time of update, you will see a white solid light at the back of your router device. Select the option of Continue when the lights go off on your Ring app and then select the option of Stick Up Cam.
After the update gets completed, configure the motion zones of your Stick Up Cam. After that, open Live View for testing your camera.
So, these are all the steps that you need to carry out in order to Set Up Ring Stick Up Camera in the Ring App.
 Related Blogs
How to Connect a Ring Doorbell to WiFi?

How does Ring Doorbell Work with Alexa?

How to Change Wifi on Ring Video Doorbell 2?
© 2026 SmartDevicesHelp.com. All Rights Reserved.


Top Searches in ring doorbell