The Nest Learning Thermostat (or Nest Thermostat) is a smart thermostat created by Nest Labs and invented by Tony Fadell, Ben Filson, and Fred Bould. It is an automated, programmable, and self-learning Wi-Fi-enabled thermostat that warms or cools homes and offices as effectively as possible. People benefit from the optimal use of their resources as it saves energy.
A machine learning algorithm continues to be the basis for this Nest thermostat. In the first few weeks, users have to adjust the thermostat to arrange for the reference data set.
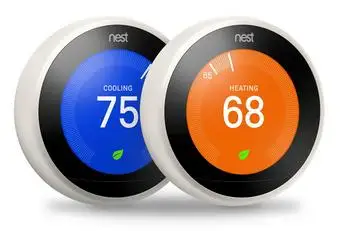
Initially, the Nest thermostat finds out the user's time table, their preferred temperature and times with the help of their built-in sensors and phones' positions; later on, it uses this information to move to the energy saving mode the instant it discovers that no one is at home.
As time passes, it understands your preferences and automatically modifies the temperature. However, if you prefer precise temperatures for particular times, then go through this blog as it gives you details on how to organize a schedule on your Nest.
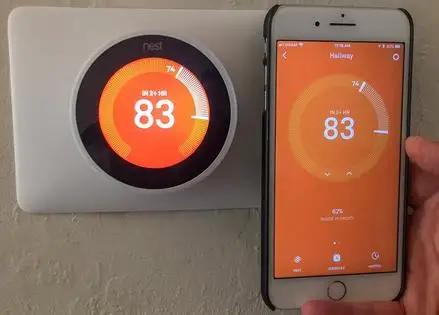
Any programmable thermostat will include such a feature. What makes the Nest thermostat stand out from the rest is that you can quickly ready this schedule using your Nest app inside the smartphone; also, you can carry this out using your Nest thermostat.
Step 1 : To begin with, open the Nest app.
Step 2 : After that, tap on your Nest thermostat on the main screen.
Step 3 : Subsequently, tap on 'Schedule' at the lowermost part of the computer screen.
Step 4 : A blank spreadsheet appears.
Step 5 : Tap on a day of the week; for example, 'Monday.'
Step 6 : Tap 'Add' in the lowermost right corner of the monitor.
Step 7 : A grid emerges.
Step 8 : At this point, tap anyplace on the vertical axis on top of the time (where you would like to announce a precise temperature.)
Step 9 : Let's say, you wish for 72 degrees at 6 AM; in that case, tap anywhere on top of '6A.'
Step 10 : The moment you touch, a dot with a temperature and a time further down come into view.
Step 11 : If you want to tweak the temperature to 72 degrees, tap and clasp the dot; after that, drag it up until it reads '72.'
Step 12 : To fine-tune the time, tap and grip the dot and drag it from left to right to declare the exact time in advance.

Step 13 : You can decide upon hourly intervals or 15-minute intervals, like 6:00, 6:15, 6:30, etc.
Step 14 : As soon as you complete these steps, the exact temperature and time will be pre-arranged.
Step 15 : In case you would like additional temperatures and times, perform the steps for a second time.
Step 16 : You can move your finger to the left to scroll into the following day and plan tomorrow's temperature/time preferences.
Step 17 : In case you would like 72 degrees at 6 AM daily, you must do the above steps six times to end the week.
Step 18 : You can also produce custom settings for every single day if you feel like.
Step 19 : To eliminate an entry, tap on 'Remove' in the lowermost right corner.
Step 20 : Later on, tap on an entry to delete it.
Step 21 : If you want to modify an existing entry, tap and grasp it.
Step 22 : Regulate it by gliding it upward or downward and left-hand or right-hand.

It is also possible to pre-arrange and change a schedule using the Nest Thermostat with the help of the scroll wheel and the display.
Step 1 : To begin with, click the unit to present the main menu.
Step 2 : Employ the silver scroll wheel to move to 'Schedule.'
Step 3 : Click on it.
Step 4 : On the Schedule screen, click on the unit to pre-arrange a timetabled temperature for your Nest thermostat.
Step 5 : Select' New.'
Step 6 : Utilize the wheel to scroll to the daytime that you wish for.
Step 7 : Click on the unit to select it.
Step 8 : Subsequently, roll the wheel to pick out the exact temperature that you want to pre-set your Nest thermostat to.
Step 9 : Click on the unit to choose it.
Step 10 : From that time on, the entry will be saved, and you can carry on with additional entries.
Step 11 : To alter a current entry, scroll over to it till you stay close to it; at that point, click down.
Step 12 : Afterwards, select 'Change' to make corrections.
Step 13 : To delete the entry, choose 'Remove.'
Now, you have successfully set Nest Thermostat Schedule.
 Related Blogs
How to Set Up and Use Your Nest Learning Thermostat?
How to Set Your Nest Thermostat Schedule?

What are Eco Temperatures on a Nest Thermostat?

How to Connect a Nest Thermostat to Google Home?

How to Set up a Nest Learning Thermostat?

How can I Change the Owner of Nest Camera?

How To Fix Nest Error E195? - Nest Thermostat
© 2026 SmartDevicesHelp.com. All Rights Reserved.

Top Searches in nest thermostat