
Nest Hello video doorbell is a wet wired doorbell that has advance features like facial recognition system. It is a common commodity nad used by millions of people world wide due to its high profile and cardinal features. Nest Hello video doorbell allows the users to see who's at the door, so you can never miss a delivery or visitor.
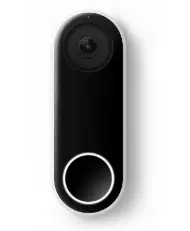
Some additional features that add to the beauty of its composition is its use in night vision mode, dispensing high quality HD videos as well as bright and sharp images. With such salient features like HDR vision,160 degree field of view, night vision mode and 24/7 streaming of idea, it has successfully established its eminence among the primary security doorbell cameras used all over the world.
You can even checkout 3 hour snapshot history to see what happened when you were not around. The foundation of Nest Hello video doorbell security cam was laid in the year 2014 for indoor monitoring while outdoor monitoring was ingrained in July 2016, and since then the company has drifted to peak of immense and boundless heights through its innovations and a motive to improvise lives of countless people.
Before we move to the meat of the content, we need to make sure that your current doorbell and chime wiring can deliver enough power. If they do not deliver enough power, you can have a Nest pro upgrade your system and install it for you. You can also download the Nest app on your mobile which will help you in setting up your Nest Hello video doorbell through step by step manual instruction.
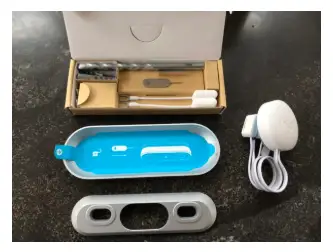
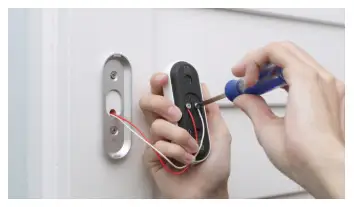
The installation process of Nest hello involves wiring on your chime and doorbell, and drilling new holes to mount hello. Now let’s follow few steps that you need to work on while installing your Nest Hello video doorbell.
Nest Hello is designed to replace your existing wired doorbell, but since some doorbell systems can’t deliver enough voltage to your Nest Hello. While most of the doorbells can be replaced by Nest Hello, there are some doorbells whose wiring is not compatible with that of Nest Hello video doorbell. In case your existing doorbell, you can buy a local Nest pro which will enhance the voltage of your doorbell power transformer.

What You Need -
A compatible phone or tablet that can be synced.
Username and password of your wifi network
Internet connection with a minimum speed of 2mbps in order for the camera to work.
Create a Nest Account or Sign Into Your Existing Nest Account-
If you are new to Nest, you can download the Nest app from the play store in case you are an android user or download the Nest app from apple app store if you're an iOS (APPLE ) user and create a new account. However if you already own a Nest product, you can sign in your existing account.
Scanning the QR Code-
If you are new to Nest - Tap on the Add New + one the home screen.
If you already own a Nest product - Tap on the settings option present on the left side of the navigation panel present on the display screen of your app.
You will now be prompted to scan the QR code which is on the back of the camera body.
Once the QR Code is being scanned, the Nest app will know that you are installing the Nest Hello video doorbell.
Turn Off the Power
Turn off the power of the fuse box of your home so in case if there is excess voltage, your equipment won’t get damaged.
Remove the Chime Cover
Remove the cover on your doorbell chime. You might need a screwbox to uncover the chime.
Follow the Manual Instructions on the App
You can now follow the onscreen instructions displayed on your mobile screen which will help you in the installation process of Nest Hello video doorbell.
Mount the Doorbell
Once you have followed the on screen instructions of wiring, it's now time to mount the doorbell.
Ensure that the connector and chime do not touch each other.
Put the chime cover back.
Disconnect Your Current Doorbell
Remove your existing doorbell and replace the wires.
Mark Holes for The Door Plate
You need to mark holes on the door plate with a drilling machine.
Installing the Wire Plates
Install the screws. Make sure the Nest logo is at the bottom. The wall plate is not reversible.
Use a bubble level to double check that the plate is level. The horizontal screw hole on the plate’s bottom will let you straighten the backplate if needed.
Before you connect the wires, make sure that the wires are clean. It does not matter which terminal is being used for connecting the wires. You can also use the wire extenders if you think that the wires are too short.
Mounting the doorbell
After you successfully configure the wire, it's time to mount the doorbell onto the backplate.
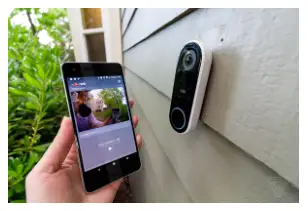
Switch on the power and check if the doorbell is working
Sync your Nest Hello video doorbell with your smartphone and connect your doorbell with the support of your wifi username and password.
Your Nest Hello video doorbell is now installed and ready to use.
 Related Blogs
How to Install Nest Hello Video Doorbell?
How to Fix Nest Talk and Listen Not Working?
How to Set up Nest Thermostat E Without C Wire?
How to Hook up the Nest Thermostat?
Why is Nest Camera Blinking Green Led Lights?
What to Do if My Nest Thermostat Goes Offline?
How to Setup WiFi on Nest Camera?
Copyright © 2026 smartdeviceshelp | All Right Reserved.
Top Searches in nest hello doorbell